The cost of Christmas party decorations is at its highest as Christmas day draws near. But what would December 25th be without a cheerful house, vibrant lights, and a tree decked out with adorable decorations and bells dangling from the walls?
Kids can simply make these super-fun & simple Christmas origami ideas and decorate their homes with a Christmas theme. In this page, you will learn how to make a Christmas tree, snowman decorations and cards.
The Japanese art of paper folding is known as origami. The magnificent & wonderful pastime of making Christmas origami creations is perfect for kids. It makes celebrating the day exciting, joyful, and educational at the same time for both parents and children.
The best part of these Christmas origami is that they are inexpensive and add an irresistible and adorable touch to your holiday gathering. You only need paper and scissors. Let’s learn how to create an origami Christmas tree, then.
What is Origami?
Japan is where origami first gained popularity after coming from China. It is a technique for folding paper. Paper is referred to as “gami” and is folded as “ori” in Japanese. What makes folding paper so great? It’s not the same as just folding a sheet of paper to fit in your pocket for mobility when we talk about the type of paper folding we’re referring to here. Paper may be folded into various shapes, including animals like birds, butterflies, flowers, dogs, cats, and even Pokemon. There is more to origami than just folding paper. It is paper changing. Paper magic, that is. That is art.
There are many different types of origami, from the extremely intricate with realistic models to the simpler forms that are easier to fold but still quite recognizable. These models, however intricate, call for carefully thought-out folds.
Both young and elderly enjoy the hobby of origami. Depending on how complicated the model is, it could be simple or difficult. Depending on your motivations for folding, it may be calming or challenging. No matter your age or degree of expertise, it may be enjoyable. And last, magic is always present. Are you prepared to fold some Christmas origami? In this page, you’ll learn how to make some Christmas Origami decorations.
Also Read: Puzzles in Classrooms: 5 Psychological Benefits & Establishment Tips
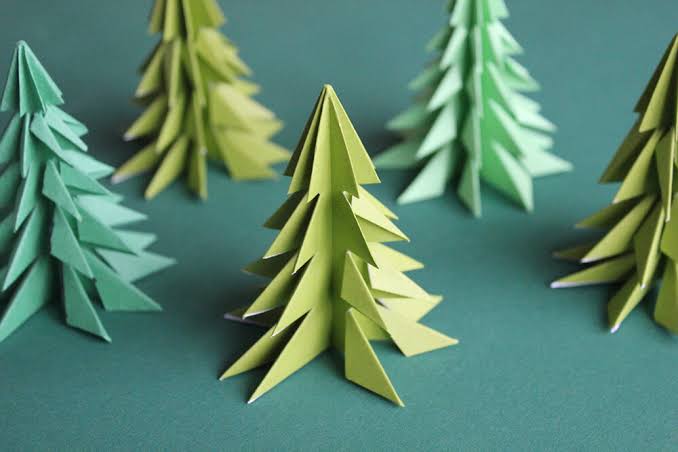
How to make a Christmas Tree: Step by Step
You’ve come to the correct place if you’ve been wondering how to make a Christmas tree. These adorable Christmas origami trees are quite easy to construct. Why not try crafting these adorable small paper Christmas trees instead of spending extra money on pricey last-minute décor ideas? Let’s look at our detailed instructions for creating paper Christmas trees:
Materials Required:
- White or coloured paper, depending on how you want your product to look
- Scissors
- A hole punch
- Plastic straw
- Glue
How to make a Christmas tree in detail
Follow These Step-by-Step Directions to Make a Paper Christmas Tree:
- Print the outline of a tree on some green paper or the paper of your choice.
- Cut the paper into a tree shape once your template is complete.
- Take the portion of the cut-out tree and fold it continuously from one end to the other. You must maintain folds that are roughly half an inch wide. You are free to keep them wider if you so choose.
- Keep your folds neat. For this, place a craft stick in the center of the folds.
- Once the folding is complete, use the hole puncher to make a hole through each fold in the middle.
- Insert the paper straw through the opening. The paper should now be carefully stretched along the straw.
- Attach the yellow stars with glue on the tree’s crown. You can now begin making your simple origami Christmas decorations.

Also Read: 14 Good Jobs For Teens
How to make Children’s Christmas Card Designs
Depending on your preferences, you can create an origami Christmas card in a range of colors. It will appear fantastic. With just a few paper sheets, you can create wonderfully lovely cards. Therefore, prepare your Christmas design paper and stick through as we create some adorable small Christmas tree cards.
Take a look at this straightforward Christmas card idea to use for your holiday celebration.
Materials Required:
What You’ll Need to Design Christmas Cards:
- A piece of paper
- Cuts from scrap paper (For Green colour tree leaves)
- For the tree, use brown paper
- Background paper with contrast and stars
- Scissors and glue
Step-by-Step Guidelines for Designing Christmas Cards
- Take an A4-sized sheet of paper and fold it in half.
- Get two rectangles by halving the paper.
- To create a card, fold each of the rectangles in half.
- Take a piece of contrasting colored paper, such pink, to create a special background for your card. In order for the edges to appear, cut it slightly smaller than the original card size.
- Cut a tiny rectangle out of the brown paper that resembles a tree stump.
- Attach it with glue at the base of the colored paper.
- Create a tree by cutting enough green paper strips.
- Apply glue along those strips, then arrange them on the card in a triangular shape one at a time. Your finished Christmas tree origami card.
Also Read: How to become a Personal Shopper: 10 Duties, Education and Soft Skills
How to make an Origami Snowman Card
How about sending an invitation to your Christmas party through a snowman to surprise your relatives and friends even more? Make a Christmas snowman card by following these detailed directions. Look at this:
Materials Required:
What You Will Need to Make an Origami Snowman Card:
- A letter- or A4-sized sheet of paper
- Ribbons or other colored scrap paper are more options.
- Orange sketchbook paper or orange pen
- The color black
- Cutlery and glue
Instructions for Making an Origami Snowman Card
- Fold an A4 or letter-sized piece of paper in half to create larger playing cards. You can cut a sheet of paper in half to create smaller cards by folding it in half. Make a card by folding each of those half.
- A colorful paper strip should be cut out.
- Attach the strip to the card by middle-gluing it.
- To create the appearance of a scarf, trim the excess and glue it below the first.
- Draw the eyes, lips, and buttons using the black marker.
- To use as a nose, cut a carrot-shaped piece of orange paper. It can be drawn with an orange marker as well.
- Your snowman Christmas cards are complete once you’ve adhered the nose over the lips.


Frequently Asked Questions
How can Origami benefit the Brain?
Origami involves careful attention and hand-eye coordination, which enhances children's focus and helps them develop their fine motor abilities.
Which type of Origami is the simplest I can make?
Beginners can build simple origami such as the crane, envelope wallet, tissue holder, fan, boat, and paper plane.
What can I create for Christmas using paper?
You may create a variety of simple Christmas origami for your papercraft projects, including Santa Claus, Christmas trees, snowmen, Christmas stockings, and origami Christmas cards. Use the suggestions above to engage in the activities with your children.
Conclusion
So, we just saw how entertaining & imaginative it is for youngsters to build these simple Christmas origami decorations. Try out the suggestions with your children this Christmas. Children learning to break out of their routines and enjoy holidays in original ways is a mind-calming & creative learning process. Follow these detailed Christmas origami instructions to create the cutest paper crafts.
RELATED RESOURCES FOR KIDS: